My summit in a nutshell
| Type: | High-altitude, multi-day summit hike |
| Location: | Kilimanjaro, Tanzania |
| Route: | Lemosho |
| Start: | Morum Barrier Gate (3395 m) |
| Finish: | Mweka Gate (1630 m) |
| Distance: | 65 km |
| Duration: | 7 days / 6 nights |
| Elevation gain: | 3700 m |
| Elevation loss: | 5400 m |
| Elevation range: | 1640–5895 m |
| Summit day: | 18.4 km, 15–16 hr, 1287 m gain, 2137 m loss |
| Difficulty: | Strenuous |
Climbing Kilimanjaro
Kilimanjaro is the highest peak in Africa and the tallest freestanding mountain in the world. It appears on countless bucket lists for a simple reason: despite its height, it’s a non‑technical trek that’s achievable for most hikers with the right preparation. It had been on mine long before I became a committed hiker.
There’s plenty of information online about summiting Kilimanjaro – routes, itineraries, gear lists, training plans. My goal here is to focus on what matters most when you start planning: choosing a route, understanding the rhythm of each day, and giving yourself the best chance of reaching the summit.
I climbed Kilimanjaro with a group of 11 hikers on a seven‑day Lemosho itinerary with Altezza, a well‑established operator I’d happily recommend.
This article covers:
About Kilimanjaro
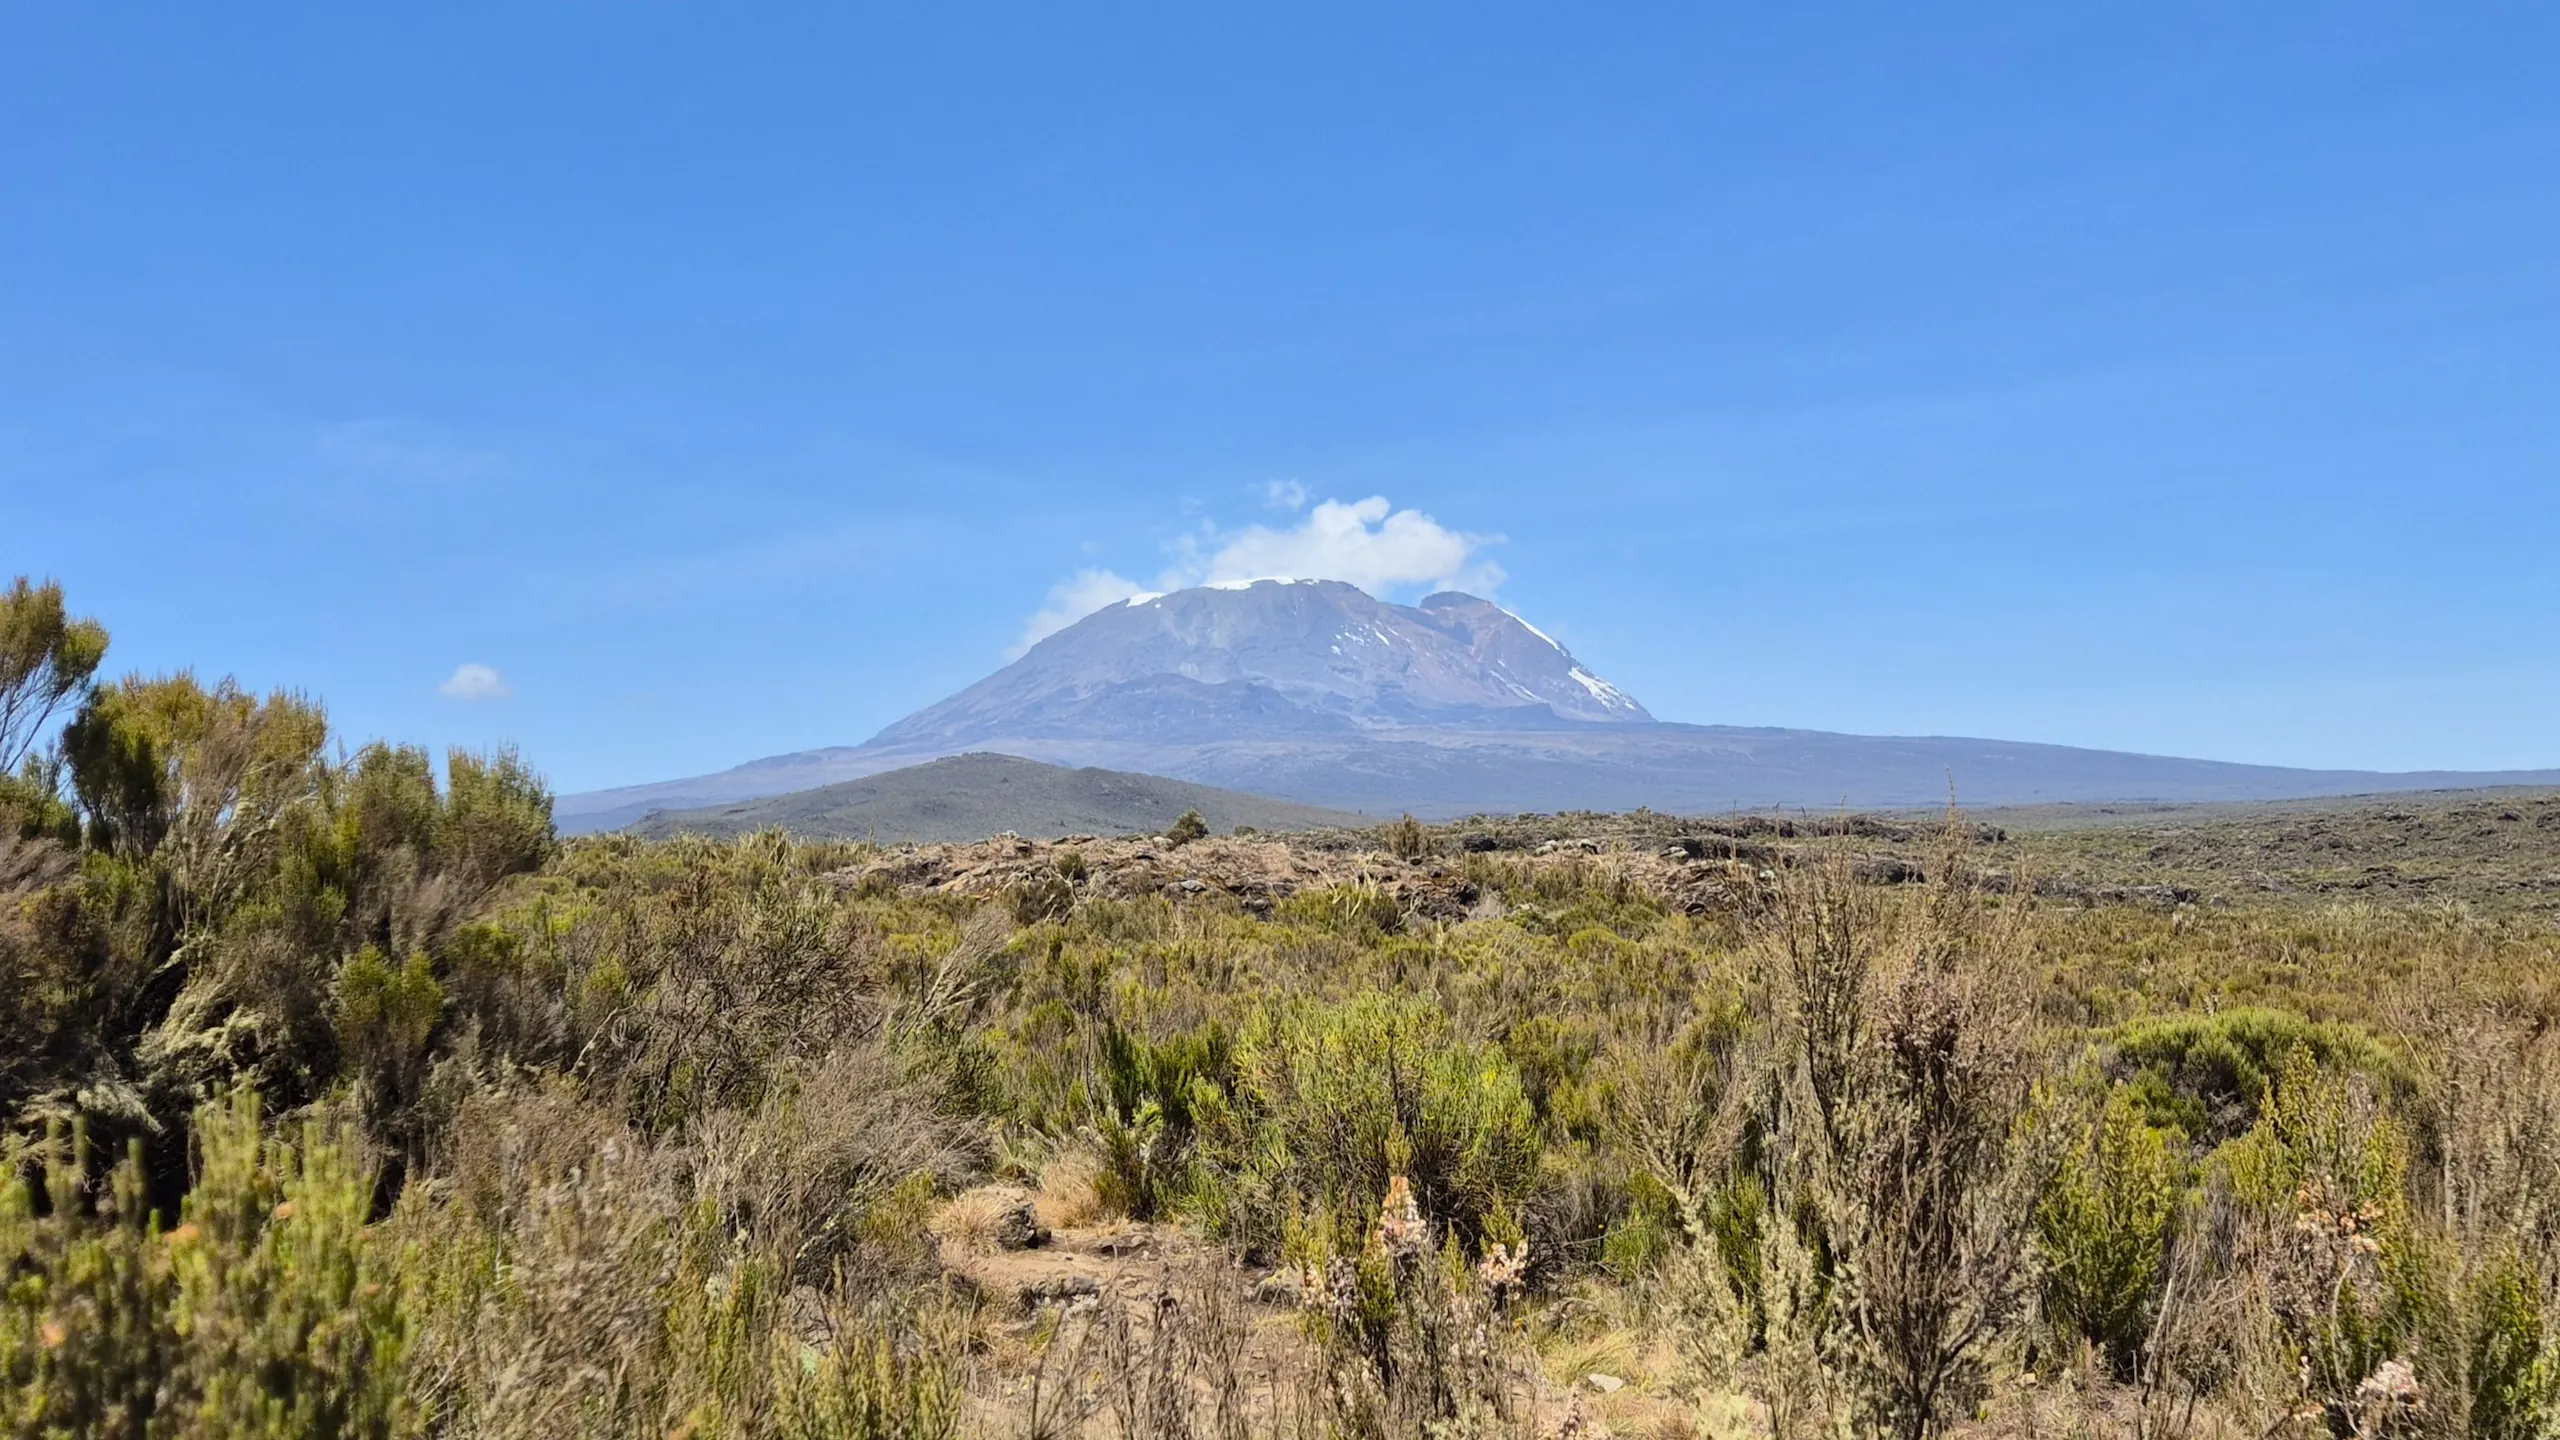
Kilimanjaro is a dormant volcano in northern Tanzania, rising to 5895 m at Uhuru Peak. It has three volcanic cones – Kibo, Mawenzi, and Shira – which give the mountain its distinctive shape.
Despite its size, Kilimanjaro is a trekking peak rather than a technical climb, which is a major part of its appeal. More than 50,000 people attempt to summit it each year, making it one of the most popular high‑altitude treks in the world.
As you climb, the landscape changes quickly. The trail begins in warm rainforest, moves through heather and moorland, and crosses a stark high‑altitude desert. Higher up, it leads to an icy summit crowned by the last remaining glaciers on the crater rim.
It’s one of the few mountains where you can walk from the tropics to an arctic‑like environment in less than a week.
Routes to the summit of Kilimanjaro
Choosing a route is one of the first decisions you’ll make when planning a Kilimanjaro climb. All routes lead to the same summit, but they differ in scenery, acclimatisation, crowds, cost, and overall experience.
Here’s a quick overview of the main options.
Marangu – “The Coca‑Cola Route”
The oldest, shortest, and only route with hut accommodation – something many hikers appreciate in bad weather. Its nickname comes from days when bottled Coke was sold at the huts, and from the route’s reputation for being the most accessible and mainstream option.
Pros:
- Huts instead of tents
- Usually the most affordable
- Straightforward trail
Cons:
- Faster ascent and lower success rates
- Out‑and‑back route with less varied scenery
Machame – “The Whiskey Route”
The most popular route, known for varied terrain and strong acclimatisation. It earned its nickname as the tougher, more rugged counterpart to the easier, hut‑based Marangu Route.
Pros:
- Beautiful, diverse landscapes
- Good “climb high, sleep low” profile
Cons:
- Can feel busy in peak season
- Camping only
Lemosho – “The Scenic Route”
Often considered the most beautiful route, Lemosho starts on the quieter western side of the mountain before joining Machame after a few days.
Pros:
- Remote and peaceful early on
- Excellent acclimatisation
- Stunning Shira Plateau traverse
Cons:
- Longer and more expensive
- Camping only
Rongai – “The Dry Route”
The only route approaching from the northern side near the Kenyan border. It’s the driest and quietest option, especially good in the rainy season.
Pros:
- Fewer crowds
- Drier and more reliable in the rainy season
Cons:
- Less varied scenery
- Fewer natural acclimatisation opportunities
Northern Circuit – “The Long Route”
The newest and longest option, circling the remote northern slopes for a full 360‑degree view of Kibo.
Pros:
- Best acclimatisation
- Very quiet
- Full circumnavigation of the mountain
Cons:
- Longest duration and highest cost
- Camping only
Umbwe – “The Direct Route”
The shortest, steepest, and most direct line up the mountain.
Pros:
- Fast, dramatic ridge ascent
Cons:
- Poor acclimatisation
- Lowest success rates
My seven-day summit hike via Lemosho
We chose the Lemosho route because it offers a quieter start, great scenery, and a strong acclimatisation profile.
One thing to be aware of is that the seven‑day version begins at Morum Barrier Gate at around 3400 m. If you’re flying in from sea level, that jump can feel high. The eight‑day version starts lower at Londorosi Gate, around 2250 m, and gives your body more time to adjust.
Our itinerary included six nights on the mountain, plus two nights at a lodge near Moshi – one before and one after the climb – which made the logistics around the start and finish much smoother.
Here’s a brief account of each day.
Day 1: Morum Barrier Gate to Shira 1 Camp
Hike: 3.9 km, 1 hr 44 min, 119 m gain, 3395–3510 m
Difficulty: Easy
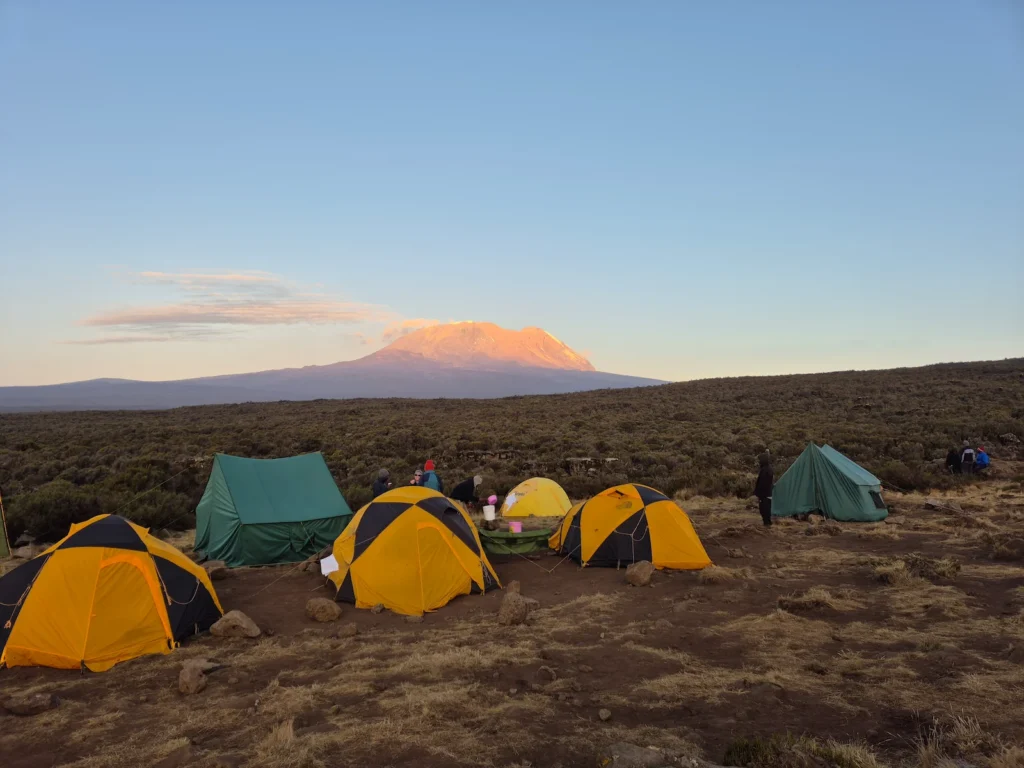
After a short drive from Londorosi Gate through the forest, I began hiking at Morum Barrier Gate in the heather and moorland zone. I stepped straight onto the Shira Plateau, which felt wide and open from the start. The trail was gentle and a relaxed way to ease into the week.
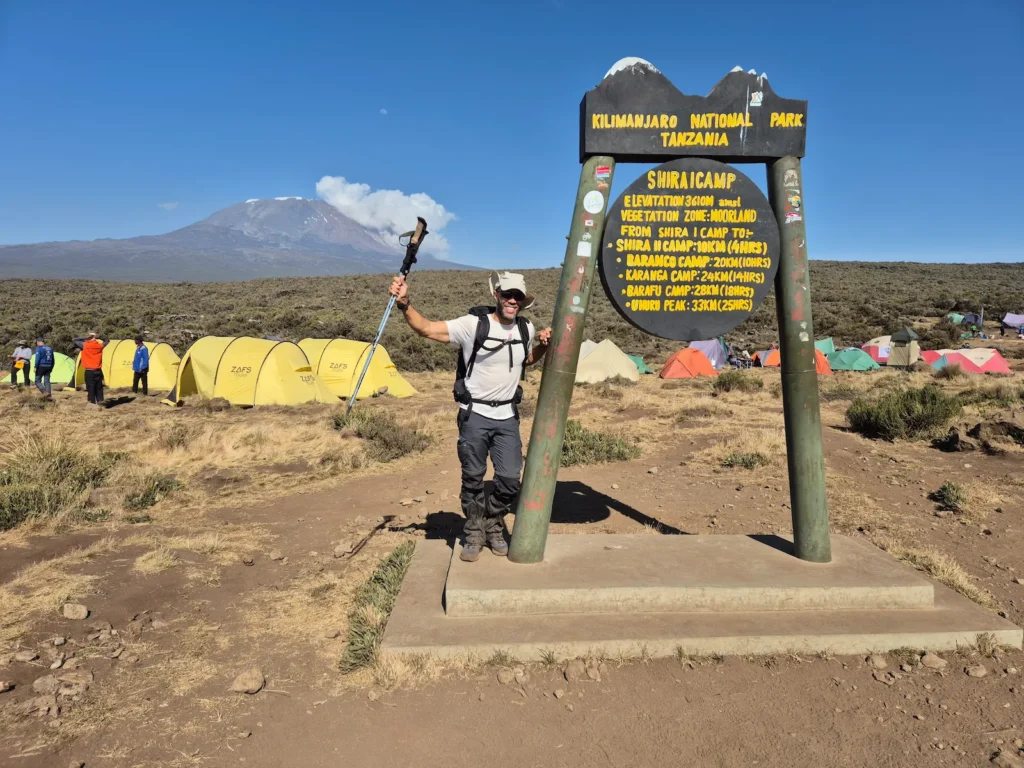
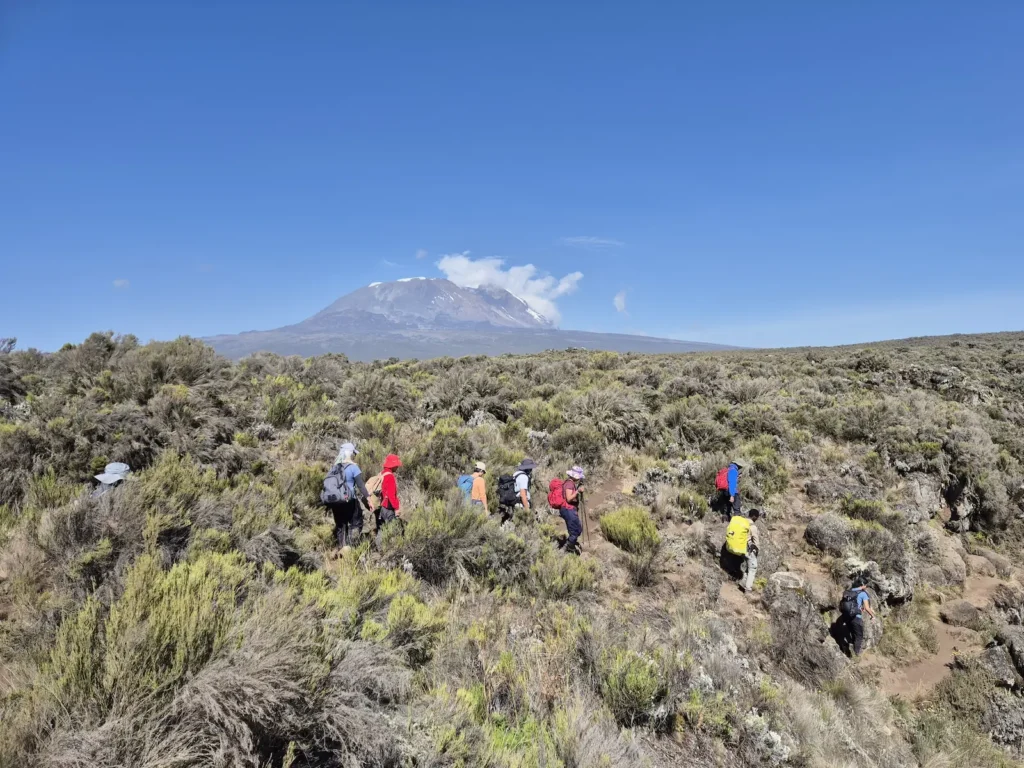
Day 2: Shira 1 Camp to Shira 2 Camp
Hike: 8.3 km, 4 hr 54 min, 409 m gain, 3497–3888 m
Difficulty: Moderate
The second day was a steady traverse across the plateau with Kibo directly ahead. It was a good acclimatisation day – enough effort to feel like you’re progressing, but not overwhelming.
Day 3: Shira 2 Camp to Barranco Camp via Lava Tower
Hike: 11.6 km, 7 hr 59 min, 790 m gain, 3888–4631 m
Difficulty: Strenuous
This was a classic “climb high, sleep low” day, important for acclimatisation.
I ascended to Lava Tower at around 4600 m, where the altitude becomes noticeable. It was a demanding climb, and it’s often the first point where people feel the effects of altitude.
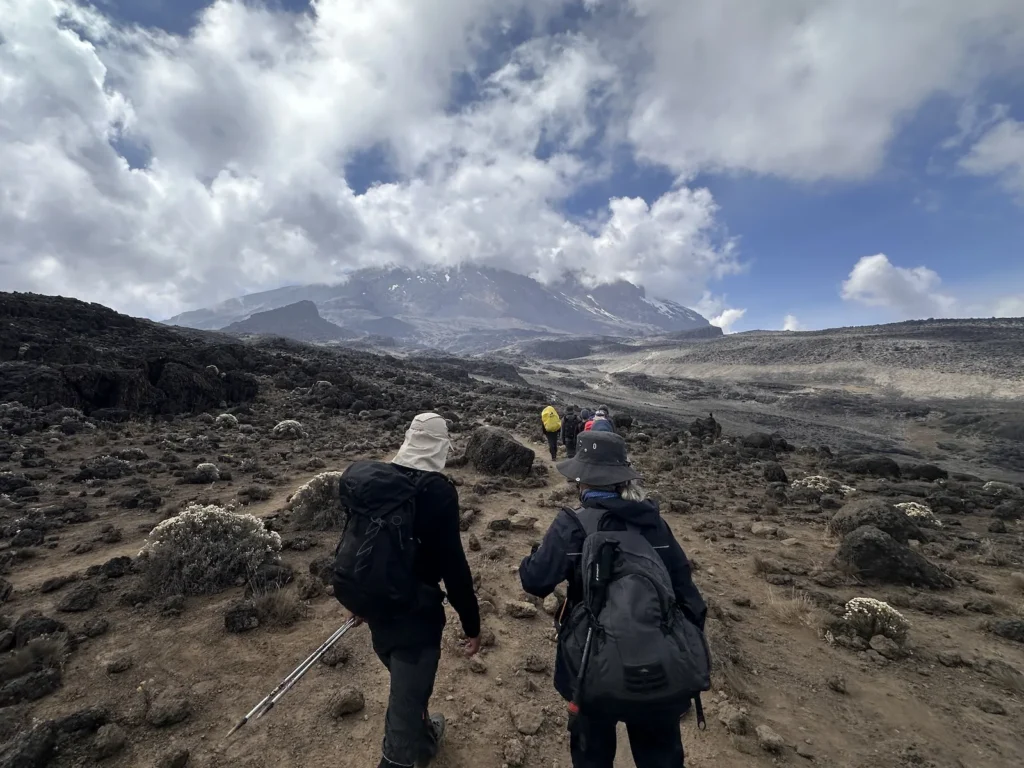
After a slow lunch, giving my body time to adjust the altitude, I descended into the sheltered Barranco Valley. After two days in heather and moorland, the landscape had shifted into an alpine desert – a harsher, rockier environment with almost no vegetation.
Day 4: Barranco Camp to Karanga Camp
Hike: 6.1 km, 5 hr 23 min, 416 m gain, 3930–4211 m
Difficulty: Difficult
The day began with the infamous Barranco Wall, a short, enjoyable scramble. Many hikers dread this section because of its dramatic drop-offs, but it was my favourite part of the trip. It broke the rhythm of the previous days and added a bit of excitement.
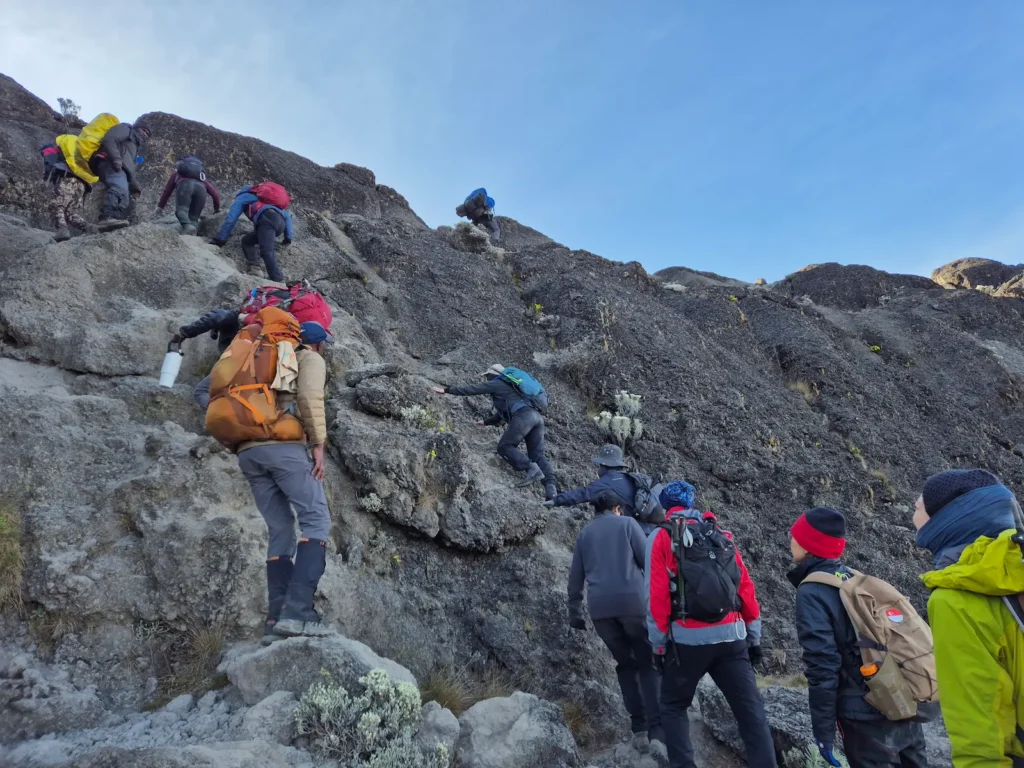
Once on top, the trail rolled across ridges and valleys before its final ascent into Karanga. The constant up-and-down made it a tougher day than the distance suggests.
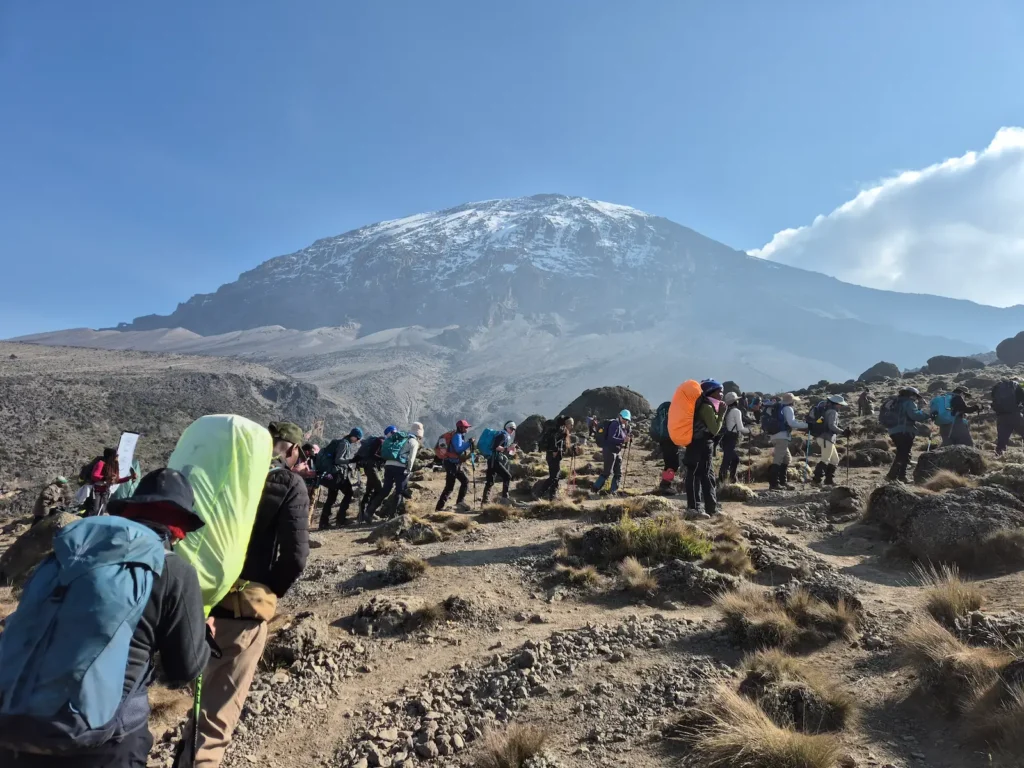
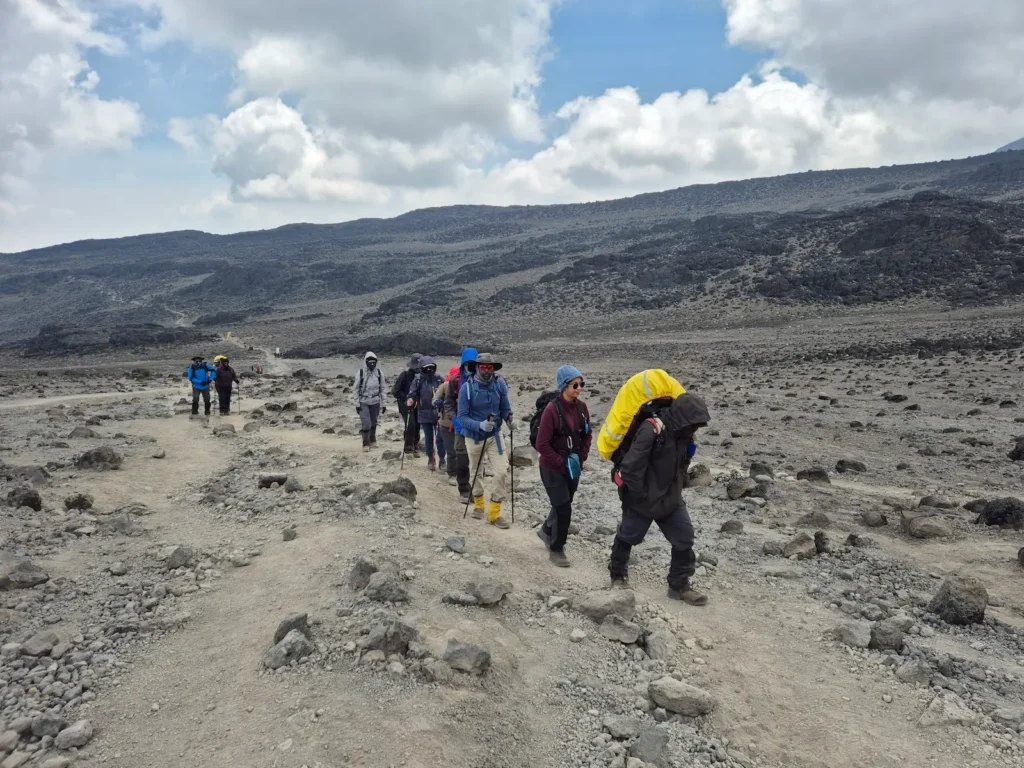
Day 5: Karanga Camp to Barafu Camp
Hike: 4.2 km, 4 hr 13 min, 675 m gain, 3995–4670 m
Difficulty: Difficult
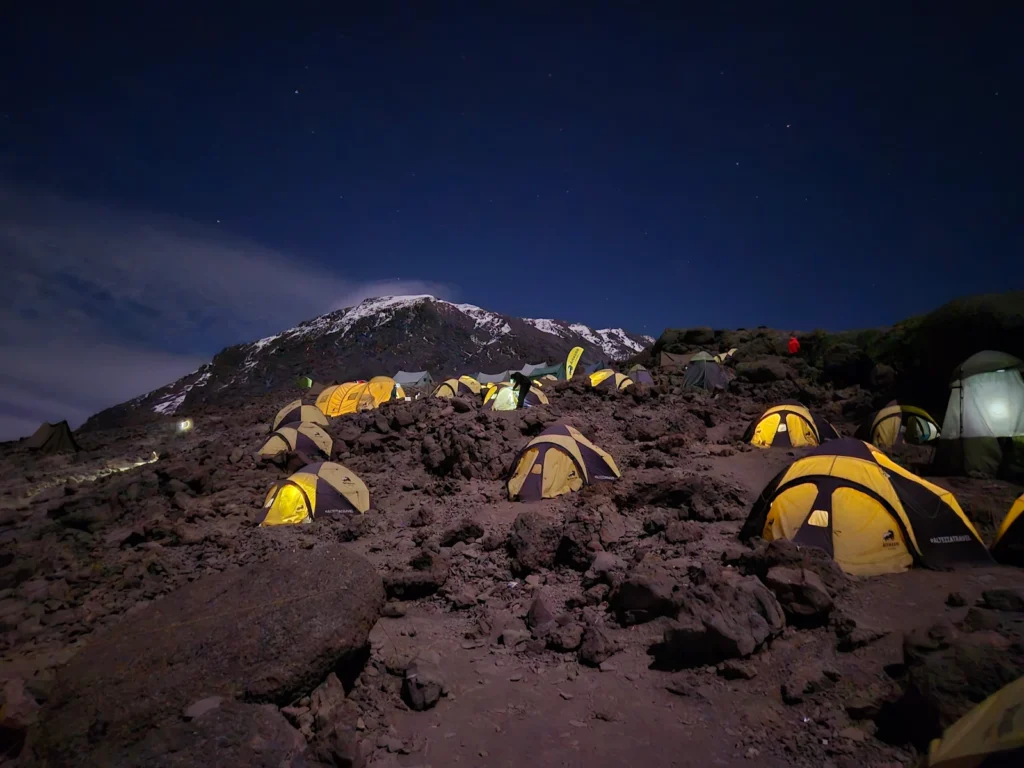
This was a short, steady climb through the alpine desert leading to Barafu (4670 m), my summit base camp. I arrived early afternoon, giving me time to eat, hydrate, and rest before the midnight summit start.
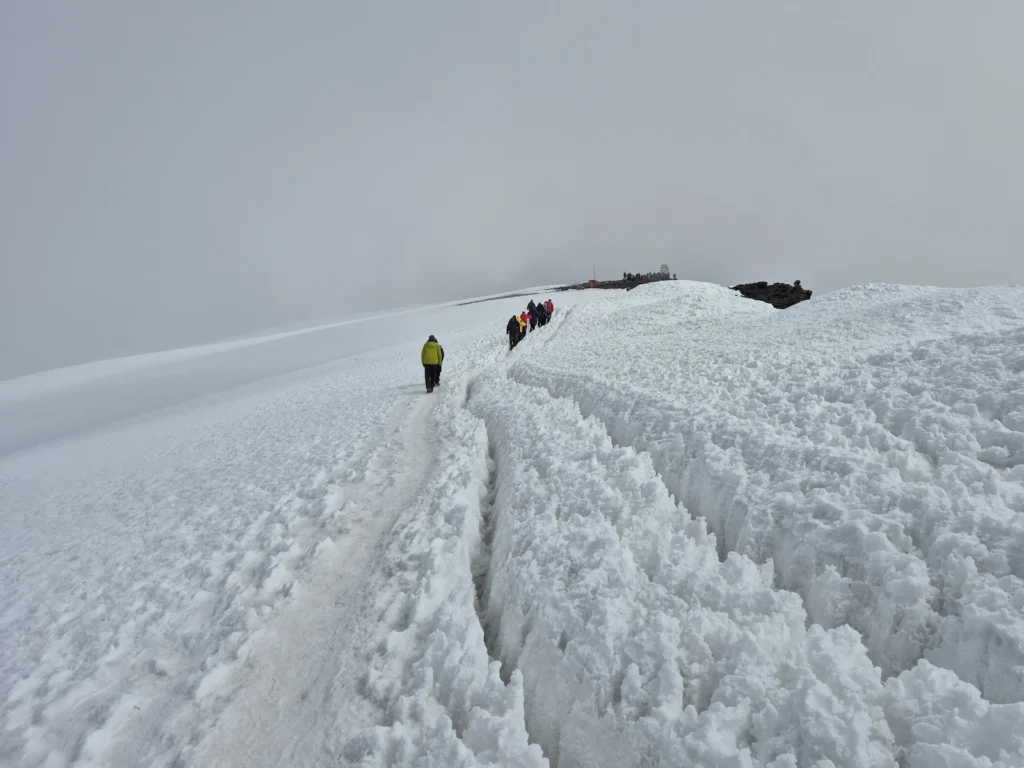
Day 6: Summit Day – Barafu Camp to Uhuru Peak and Millennium Camp
Hike: 18.4 km, 15–16 hr, 1287 m gain, 2137 m loss, 3820–5895 m
Difficulty: Very strenuous
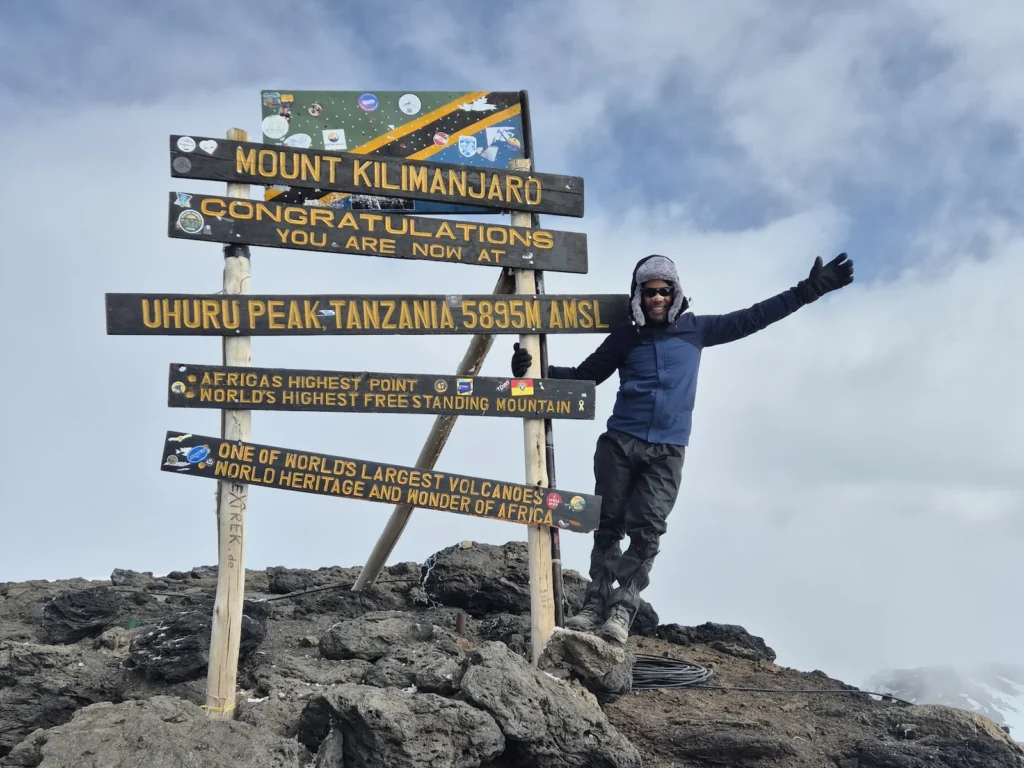
I woke up at 11 PM and began the summit push at 11:30 PM. The climb was long and slow, with a line of headlamps stretching up the slope in the darkness. It took me over ten hours to reach Uhuru Peak (5895 m).
My fitness tracker died at the summit, but I estimate the long, dusty descent to Millennium Camp took roughly another five hours – a demanding finish after an already intense night.
Day 7: Millennium Camp to Mweka Gate
Hike: 12.8 km, 5 hr 16 min, 0 m gain, 2180 m loss, 1640–3820 m
Difficulty: Moderate to Difficult
The final day was a long descent into thicker air and warmer temperatures. The trail dropped through moorland and into rainforest, which was a welcome change after the dry, high-altitude terrain of the last few days.
Three things I liked about Kilimanjaro
Several things pleasantly surprised me during my week on the mountain. These three stood out.
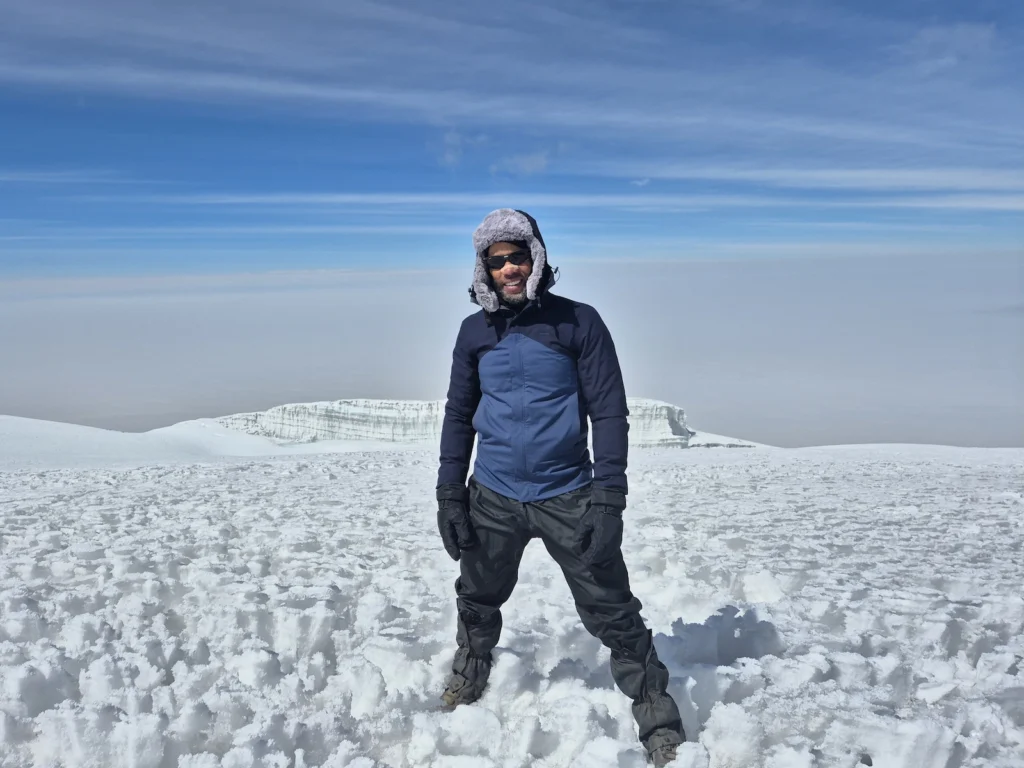
1. The view of the summit
Kilimanjaro’s snow‑capped peak is a stunning sight from the very first steps on Day 1, and it stays in view for most of the route. Having the summit ahead of you for much of the week gives a steady sense of progress.
2. The food
The cooks and porters prepared tasty, varied meals each day, often in challenging conditions. Keeping everyone well fed and hydrated all the way up the mountain felt like a small miracle.

3. The professionalism of staff
Our team of guides, cooks, and porters was organised, supportive, incredibly friendly, and genuinely fun to be around. It was also great to see staff from different operators helping one another on the trail.
Three things to be aware of
While Kilimanjaro is a beautiful mountain and a wonderful experience, there are a few things worth knowing before you go.
1. Human waste on the mountain
High altitude conditions can cause stomach issues, and unfortunately not everyone buries their waste properly. Stepping off the trail for a quick break often meant finding toilet paper or waste left behind by other hikers. This was probably amplified by the dry season, but guidance from the park on carrying and using trowels would make a difference.
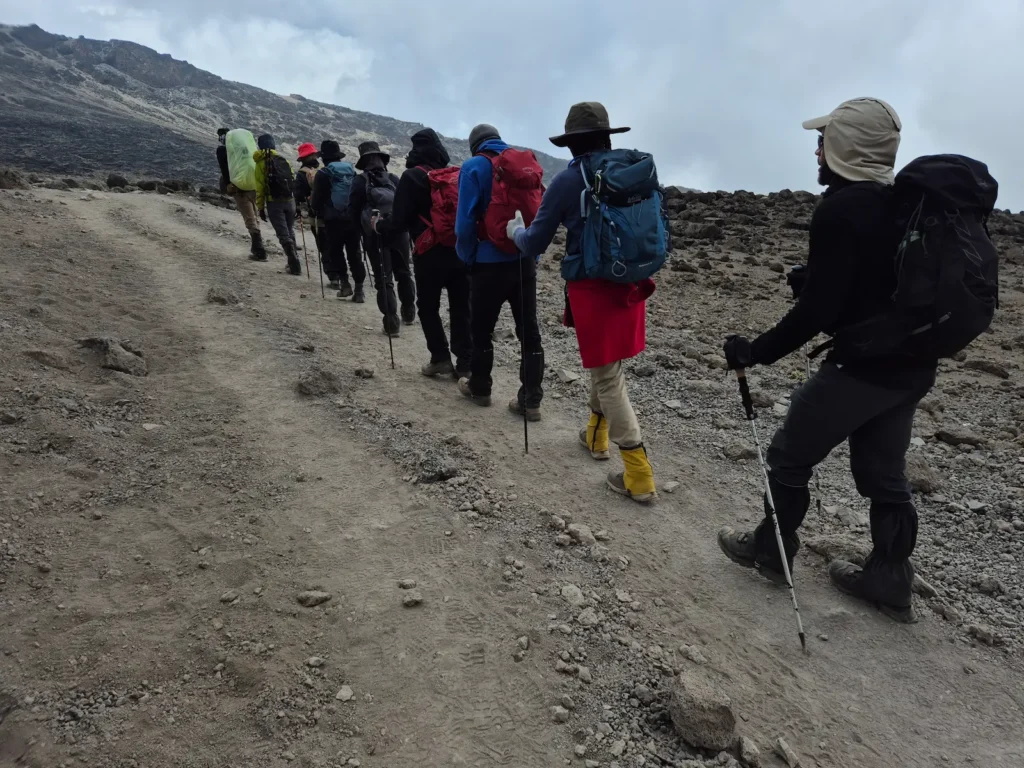
2. Crowds at camps and on summit night
Campsites were busy, and summit night began with long queues leaving Barafu Camp. Choosing a quieter month can help, although this often overlaps with the rainy season.
3. Limited terrain variety
Aside from the Barranco Wall on Day 4, much of the route crossed similar moorland and high‑altitude desert. The scenery was impressive, but the trail variety was more limited than I had expected. On the seven-day Lemosho route, the only real rainforest section was on the descent on the final day.
How to improve your summit success chances
Kilimanjaro isn’t technical, but at 5895 m the altitude is the main challenge. Acclimatisation is the single biggest factor in whether you reach the summit. These seven tips can help improve your chances.
1. Choose a slower route
Routes like Lemosho, Machame, and the Northern Circuit build in more days above 3500 m, giving your body more time to adapt. Shorter routes such as Marangu, Rongai, and Umbwe move faster and demand more of you.
2. Add an acclimatisation day
If you can include an additional day in your itinerary, it’s worth it. One extra night at altitude can make a big difference, as summit success rates generally increase with each additional day on the mountain.
3. Hydrate consistently
Altitude dehydrates you quickly, and dehydration makes every symptom feel worse. Drink steadily throughout the day – and more than you think you need – rather than trying to catch up at camp.
4. Eat even if you don’t feel hungry
Loss of appetite is common at altitude, but your body needs calories to stay warm and keep moving. Your guides will encourage you to eat well at camp – listen to them. Bring familiar snacks you know you’ll eat – summit night is not the time to experiment.
5. Walk slower than feels natural
Your guides will frequently say “pole pole” – Swahili for “slowly”. A slow, steady pace keeps your heart rate down and helps your body handle altitude. The goal is to conserve as much energy as possible for summit night.
6. Train for endurance
You don’t need to be an athlete, but you do need to be comfortable with long days on the trail. The fitter you are, the more capacity you have to cope with altitude.
7. Layer properly for summit night
Summit night is cold, and cold can amplify the challenge. A good base layer, a warm mid‑layer, and a reliable down jacket and outer shell make a huge difference. Most operators have the right gear available to hire. Keep your hands and head covered, and try not to start the climb either too hot or too cold – finding that balance is key.
Final thoughts on climbing Kilimanjaro
Kilimanjaro rewards patience. The days are steady, the routine is simple, and the summit gets closer with every step. It’s not a perfect mountain – it can be busy and dusty, and the terrain changes less dramatically than on other treks. Still, it remains accessible and genuinely rewarding.
Reaching the crater rim after a long night hiking in the cold – and after almost a week on the mountain – is a special moment. If you’re looking for a high‑altitude trek that’s both challenging and achievable, Kilimanjaro offers a memorable ascent to the roof of Africa.